Citrix Netscaler Certificate Import and Installation process
I recommend importing and converting the PFX to PEM since this will encrypt your key file. Netscaler 11 does allow a slightly faster method to install new certificates, but the key is not encrypted. This import and installation method below will encrypt your key file.
Login to your Netscaler.
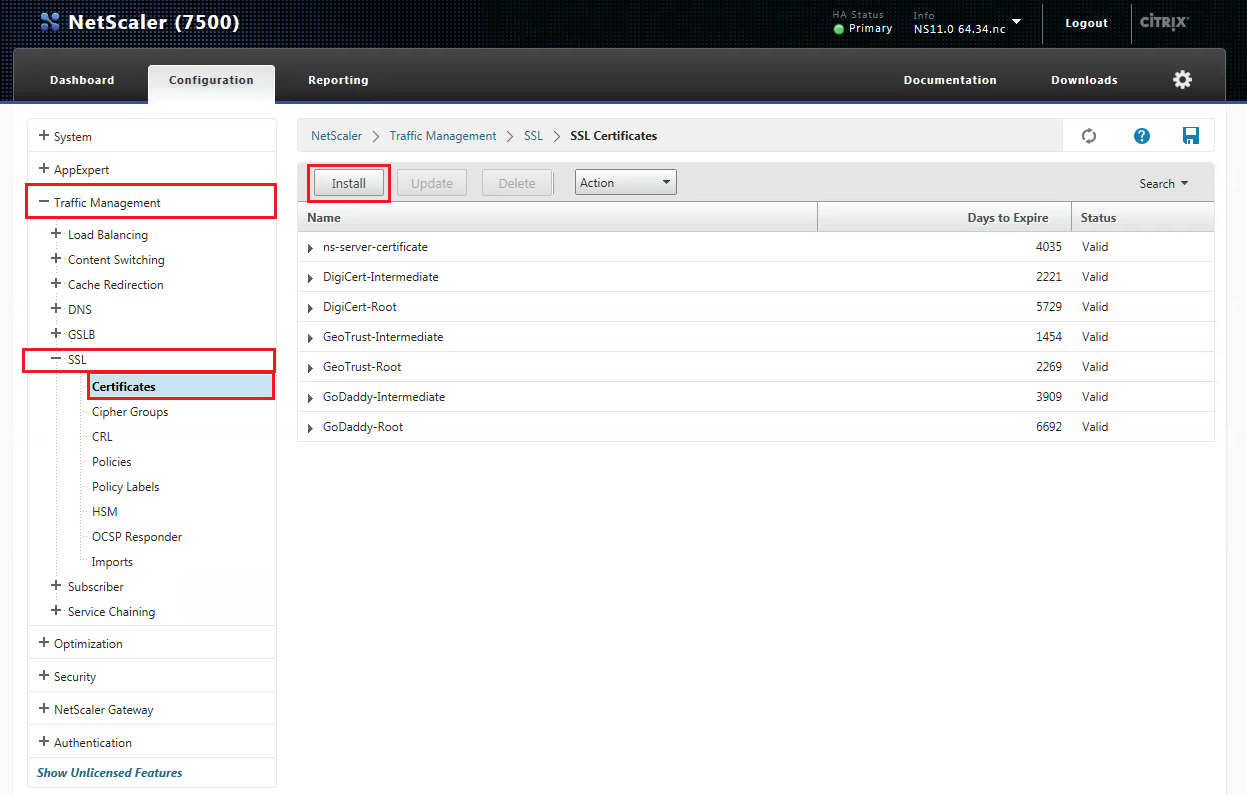
Go to Configuration > Traffic Management > SSL. Under Tools, click on Import PKCS#12.

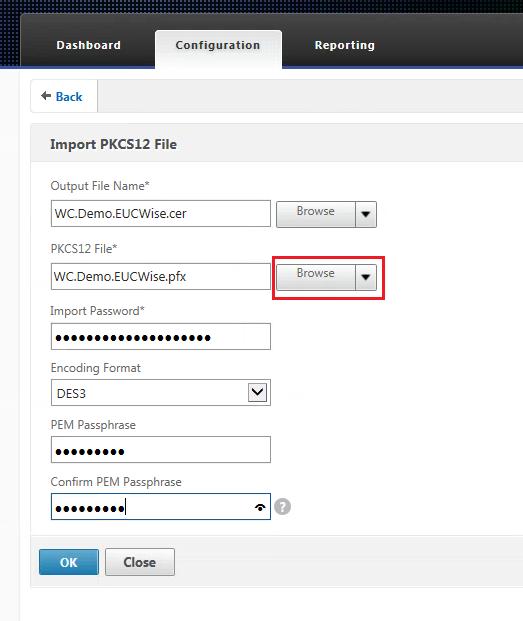
Type a name in the Output File Name, then browse for your PFX file.
Specify DES3 Encoding Format. This will encrypted the output file. Type in the password you used to export the pfx into the Import Password field.
Type in a new password in the PEM PassPhrase field. Click OK to complete the import.
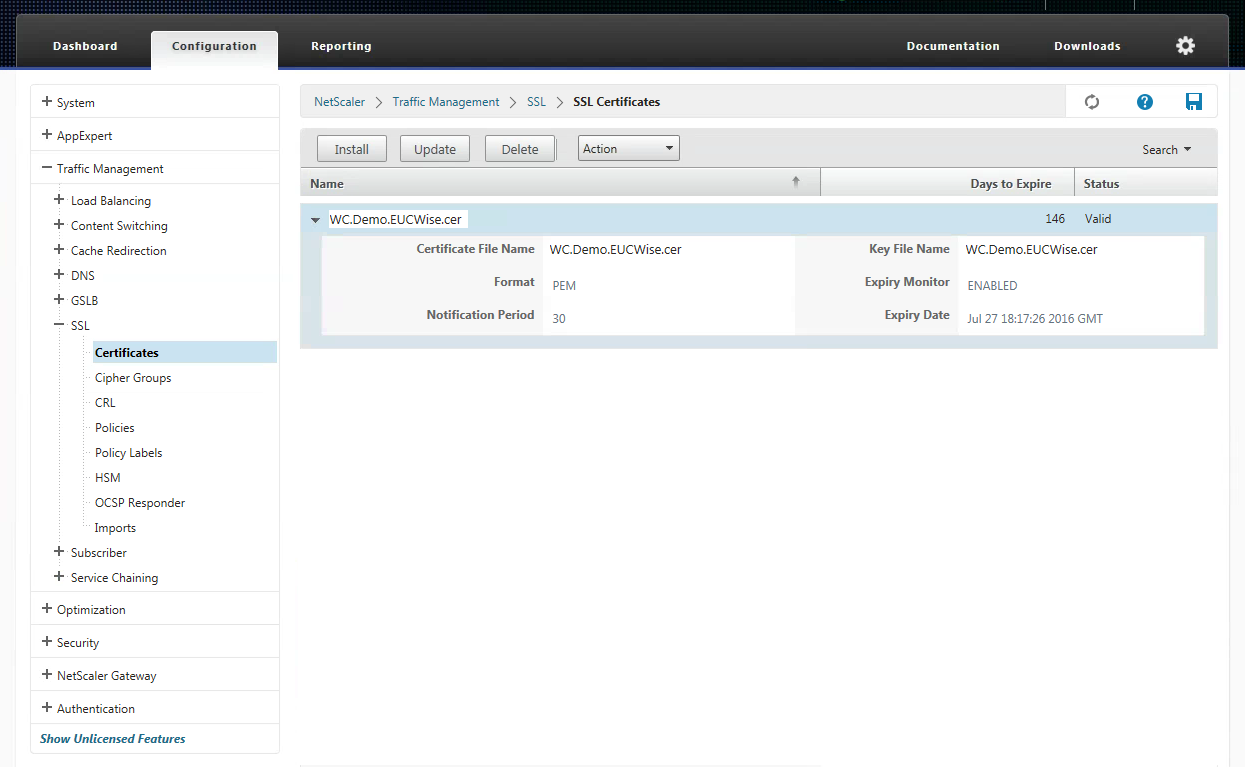
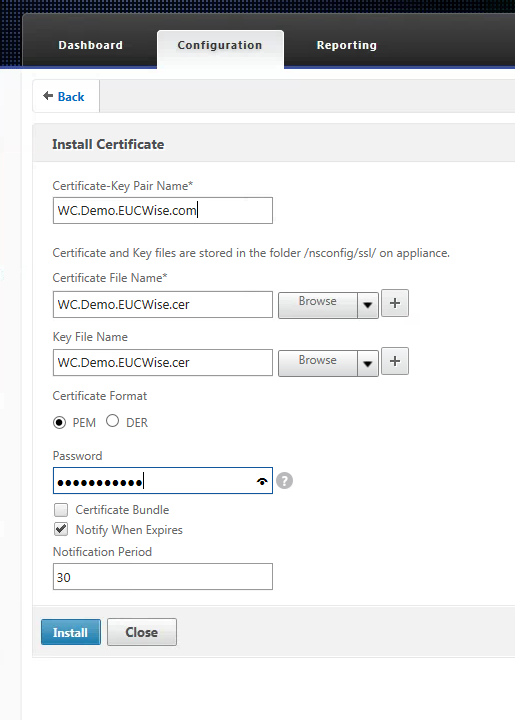
Next, step will need to install and link the certificate. Go to Traffic Management > SSL > Certificates > Install.
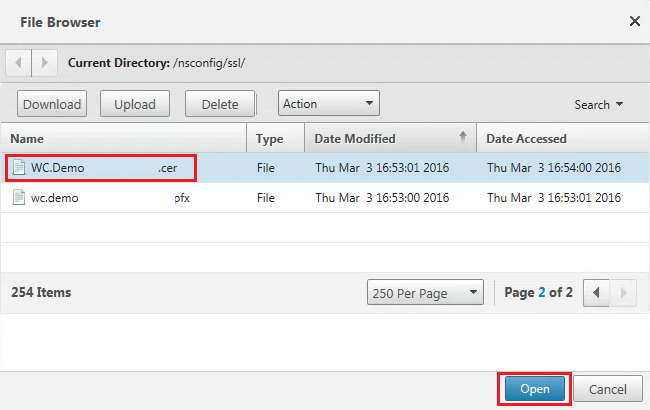
Type in a name for the Key-Pair Name, which is basically just a friendly so you know what the certificate is for. Browse for the .cer files and import them for both fields Certificate File Name and Key File Name. Type in the password and click Install when finished.
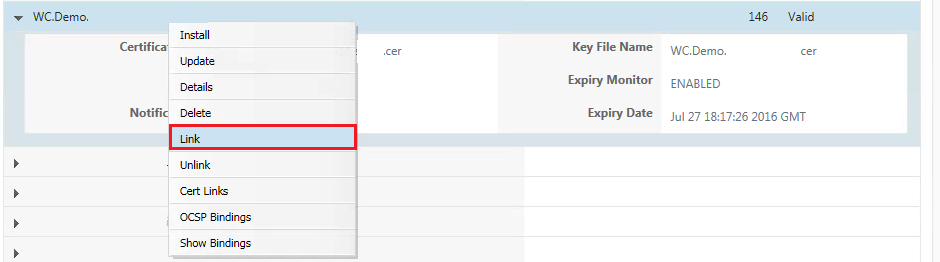
After you completed the certificate installation above, right click on the certificate and click Link. We will need to link the certificate.
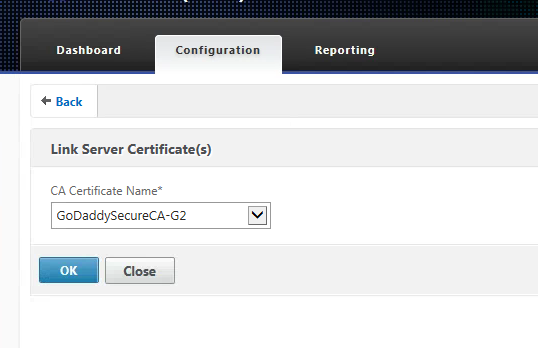
Select the correct CA Certificate. Click OK when finished.
This completes the import and installation process of a PFX certificate on a Netscaler.